Currently Empty: £0.00

Sewing enthusiasts often face a dilemma when choosing between traditional paper patterns and modern digital sewing patterns. With the rise of digital downloads, sewing has become more accessible, flexible, and eco-friendly. If you’re new to using digital sewing patterns, this guide will walk you through everything you need to know to get started confidently.
What Are Digital Sewing Patterns?
Digital sewing patterns are downloadable files, typically in PDF format, that contain all the instructions and templates needed for a sewing project. They can be printed at home or at a local print shop and are a convenient alternative to pre-printed patterns.
Step 1: Find the Right Digital Pattern
The first step is to choose a sewing pattern that matches your skill level and project needs. Whether you’re sewing clothes, accessories, or home decor items, you’ll find endless options online.
- Look for patterns with detailed instructions and clear illustrations.
- Read reviews or user feedback to ensure the pattern is easy to follow.
- Double-check the size options to match your measurements.
Step 2: Download and Save the File
Once you purchase a pattern, you’ll typically receive a link to download it.
- Click the link and save the file to your computer.
- Create a folder specifically for your sewing patterns to keep them organized.
- If available, download both the A4/Letter-sized version for home printing and the A0 version for large-format printing.
Step 3: Print the Pattern
Printing digital sewing patterns is a crucial step. Here’s how to do it right:
- Use a reliable printer: Ensure your printer has enough ink and paper.
- Select “Actual Size” or “100% Scale”: This ensures the pattern pieces print at the correct size.
- Print a test square: Most patterns include a test square to verify the scale. Measure it with a ruler before printing the entire file.
- Print on sturdy paper: Standard printer paper works, but sturdier paper is easier to handle.
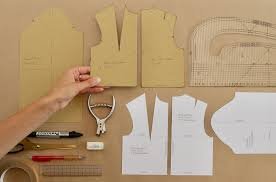
Step 4: Assemble the Pattern Pieces
Digital sewing patterns are typically printed on multiple sheets of paper that you need to assemble.
- Lay out the pages: Arrange the printed pages according to the pattern’s layout instructions.
- Align the edges: Match up the lines and markings between pages.
- Tape or glue: Use clear tape or a glue stick to attach the pages together.
- Cut out the pieces: Once assembled, cut along the pattern lines for the specific size you’re sewing.
Step 5: Prepare Your Fabric
Before cutting your fabric, prepare it for sewing.
- Wash and iron your fabric to pre-shrink it and remove creases.
- Lay it out flat on a clean surface.
Step 6: Transfer the Pattern to Fabric
Place the pattern pieces on your fabric, following the grainline indicated on the pattern.
- Pin or use pattern weights to secure the pieces in place.
- Trace around the pattern pieces with tailor’s chalk or a fabric marker.
- Add seam allowances if they aren’t included in the pattern.
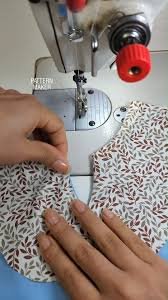
Step 7: Start Sewing!
Now it’s time to bring your project to life. Follow the pattern instructions carefully. Digital patterns often include detailed steps, tips, and diagrams to guide you through the sewing process.
Benefits of Digital Sewing Patterns
- Instant Access: No waiting for shipping—download and start immediately.
- Reusability: Save the file and print it as many times as needed.
- Customizability: Easily scale or adjust patterns to fit your needs.
- Eco-Friendly: Reduce paper waste by storing patterns digitally.
Tips for Success
- Always read through the pattern instructions before starting.
- Keep a notebook handy to jot down adjustments or measurements.
- Invest in good tools like sharp scissors, quality thread, and a reliable sewing machine.
Digital sewing patterns are revolutionizing the sewing world, offering convenience and flexibility for creators of all skill levels. By following this step-by-step guide, you’ll be ready to tackle your first project with ease and confidence.
Ready to explore stunning digital sewing patterns? Visit EagleCreed.store and start creating today!
Happy sewing!